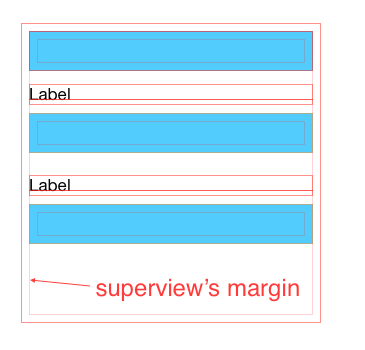
Setting your constraints relative to margin in a xib file or storyboard DOES NOT make your app crash on iOS7, and it DOES NOT make a UI difference on your iOS7 device neither, as long as you don’t touch the
UIView.layoutMarginsandUIView.preservesSuperviewLayoutMarginsproperties in your code.
What is Margins in iOS8
Layout margins represent padding around the interior of a UIView that the layout system can use when laying out subviews – to ensure that a gap is left between the edge of a view and a subview. In this respect it is very much like the padding property associated with blocks in CSS.
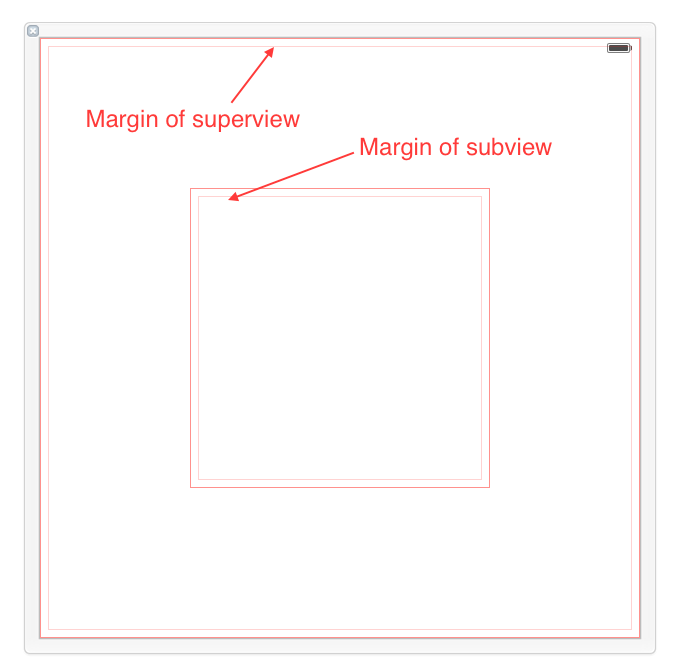
By default, a UIView has layout margins of 8 points on each side, and this can not be changed in Interface Builder, but by setting the UIView.layoutMargins property in the code which is only available on iOS8. I think iOS7 has its way to detect if you’ve set your constraints relative to margins or not, and it simply gives the constraints that related to margins extra 8 points space. However you can not change it because there’s no such property in iOS7.
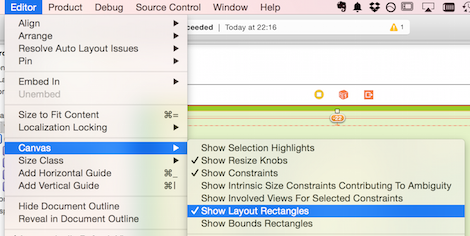
You can get IB to display the margins with Editor > Canvas > Show Layout Rectangles:
Margins itself doesn’t affect the contents of your view at all. Every UIView come with its margins by default, it’s still there even if you don’t use it, not affecting anything. It only comes into use when you’re setting up a constraint that is related to margins. It’s only used to help you layout your view and subview.
How to use Margins
The only way to get margins involved in IB is to check the Relative to margin item while setting up your constraints. This is another way of declaring Use my margins instead of my edges while laying out me.
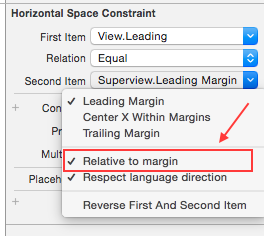
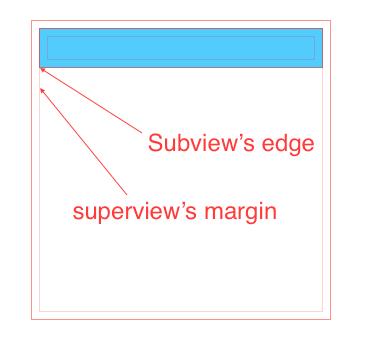
Let’s take a look at four different ways of setting up a leading constraint between a view and its subview. In this case of the constraint, the first item is subview’s leading and the second item is superview’s leading. While the leading is just a concept here, but mark and unmark the Relative to margin of each item, you can actually select the left edge or left margin as your leading here to use as your leading to layout your views.
- First item(uncheck), second item(check). In this case, we’re declaring that subview’s left edge should align to superview’s left margin(as what is shown in the image).
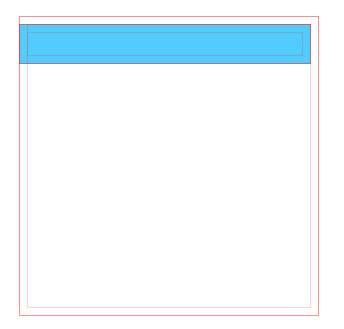
- First item(uncheck), second item(uncheck), both using edge not margin. In this case, we’re declaring that subview’s left edge should align to superview’s left edge.
- First item(check), second item(uncheck). In this case, we’re declaring that subview’s left margin should align to superview’s left edge. This kind of layout actually has made the subview overlap the superview.
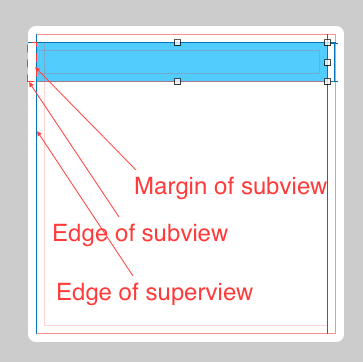
- First item(check), second item(check). This actually has a same effect as case 2, since both subview and superview has a same default margin. We’re declaring that subview’s left margin should align to superview’s left margin.

What is good with Margins
This new feature comes with iOS8 doesn’t have a big impact on our way of developing UI if we’re not using the margins. But using it correctly can facilitates out development a bit in the case if we have many subviews displayed in a superview, and all the subviews share a same leading, top,… space to the superview. Because in this case, if we set all constraints with a fixed spacing, once there comes a change on the spacing we have to update the constraints one by one. However if margins were used, we can just reset the margin of the superview by just single line of code like,
1
| |
However, this is only available on iOS8.
In the following case, all subviews’ left edges are aligned to superview’s left margin. Thus, changing superview’s left margin can affect all subviews at the same time.
